
Export to PC (RangeArmor)
RangeArmor is the tool that packages the game for PC. It bundles the engine runtime, your protected .range and a launcher into an executable the player opens with a double click. A single export can produce both the Windows 64-bit and the Linux 64-bit builds.
1. Install RangeArmor
Section titled “1. Install RangeArmor”RangeArmor is downloaded separately from the engine, on the same release page (RangeArmor-<version>-windows-x64.zip).
- Extract the zip.
- Rename the extracted folder to
rangearmorand put it inside the engine folder, next toAnastacioEngine.exe:
AnastacioEngine-0.5.0-windows-x64/├── AnastacioEngine.exe├── AnastacioRuntime.exe└── rangearmor/ ├── RangeArmor Panel.exe └── release/The engine looks for exactly rangearmor/RangeArmor Panel.exe at that spot. If the folder has another name, the export buttons can’t find the tool.
2. Create the project
Section titled “2. Create the project”RangeArmor works with a project folder in a fixed layout. The easiest way to create one is from the engine:
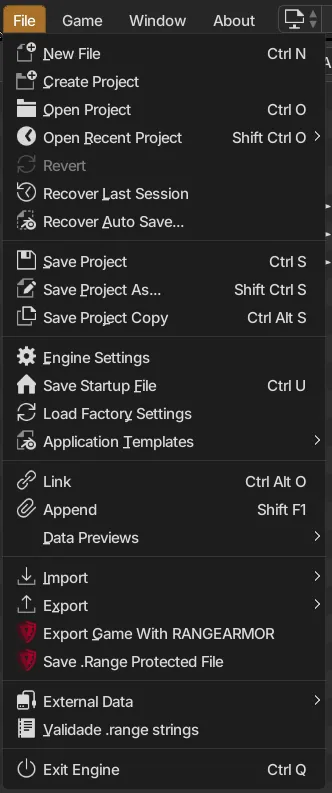
The File menu has Create Project, Export Game With RANGEARMOR and Save .Range Protected File.
- File > Create Project.
- Choose where to create it and give it a name (no
< > : " / \ | ? *). - The engine creates this structure and opens the new
.range:
MyGame/├── data/ ← the game's .range goes HERE│ ├── MyGame.range│ ├── scripts/ textures/ models/ audio/ fonts/ scenes/ libloads/├── engine/ ← runtime copied on export├── launcher/ ← config.json and launcher├── icons/└── release/ ← export outputAlready have a finished game? Create the project, then copy your .range and its files (textures, sounds, scripts) into data/, keeping the same subfolders so relative paths keep working.
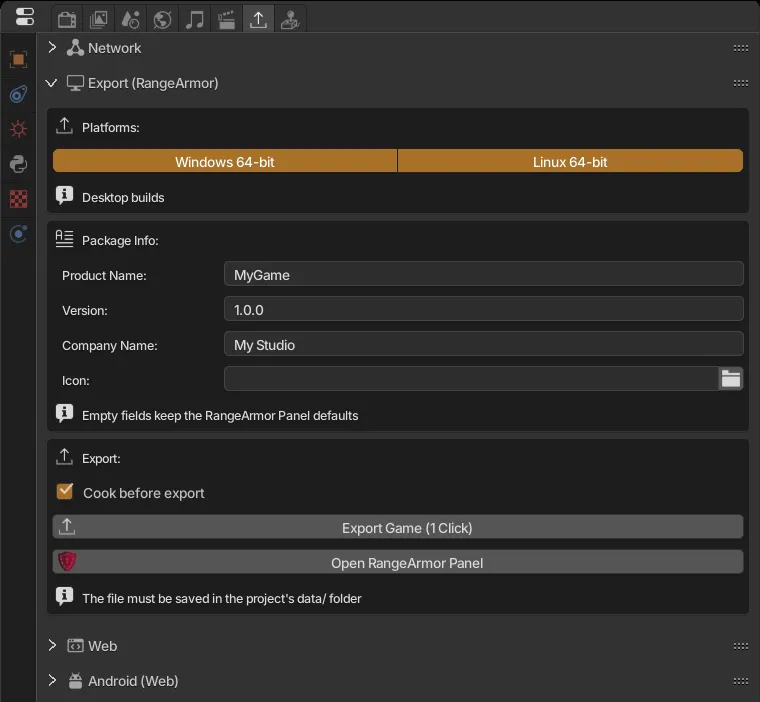
3. Configure the Export (RangeArmor) panel
Section titled “3. Configure the Export (RangeArmor) panel”In Properties > Export Game > Export (RangeArmor):
| Field | What it does |
|---|---|
| Windows 64-bit / Linux 64-bit | Platforms to build. You can enable both. |
| Product Name | Game name, used for the executable and the package. |
| Version | Package version, for example 1.0.0. |
| Company Name | Your name or studio. |
| Icon | .ico file for the executable. Empty keeps the default icon. |
| Cook before export | Builds the “cooked” cache (physics and shaders ready) so the game opens faster. Leave it on. |
Empty fields keep RangeArmor’s defaults.
4. Export
Section titled “4. Export”There are two buttons:
- Export Game (1 Click): saves a protected copy, cooks the cache and builds everything straight into
MyGame/release/. The folder opens when it’s done. This is the recommended path. - Open RangeArmor Panel: opens the full tool, with more options. The engine panel settings are passed to it.
The same panel also opens from File > Export Game With RANGEARMOR.
Another way: using RangeArmor Panel on its own
Section titled “Another way: using RangeArmor Panel on its own”You can also export without the engine buttons, by opening the external tool directly. It’s useful to export an older project or change options the engine panel doesn’t show.
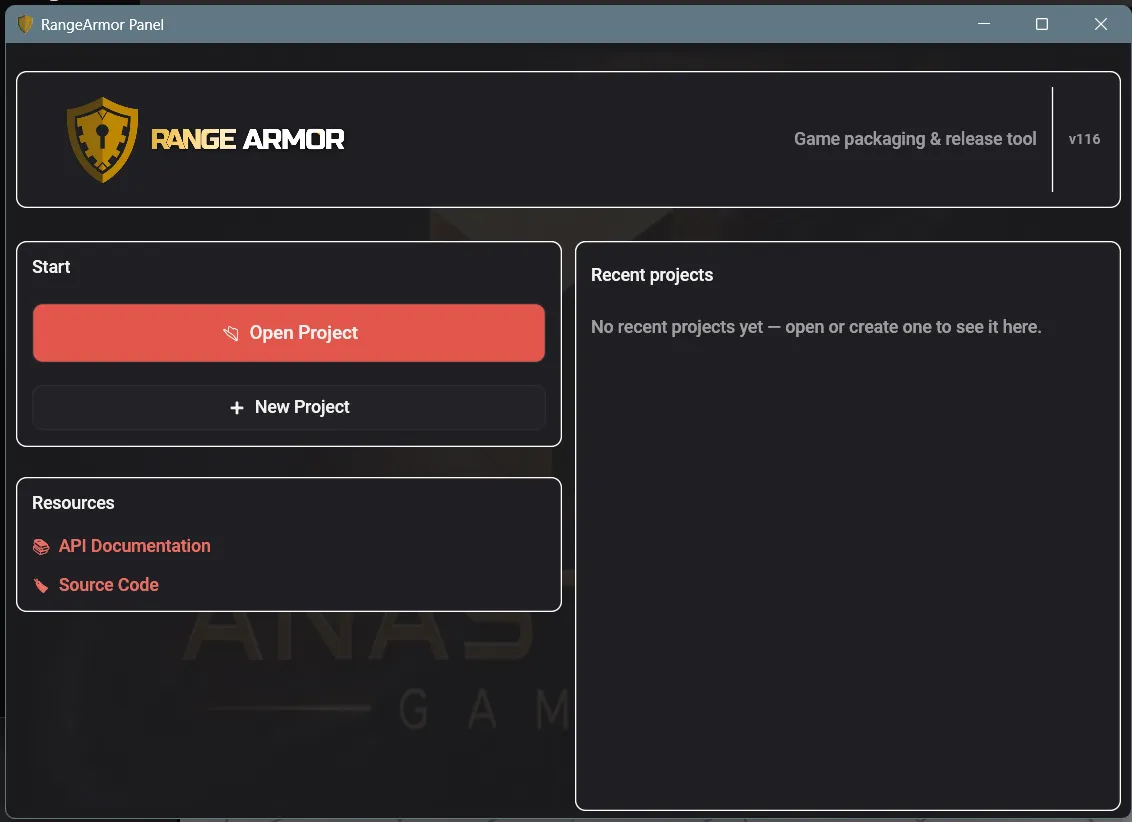
RangeArmor Panel start screen: Open Project, New Project and the Recent projects list.
- Open
rangearmor/RangeArmor Panel.exein the engine folder. It also opens from the Open RangeArmor Panel button or File > Export Game With RANGEARMOR. - On the start screen, click New Project to create a new project folder, or Open Project to open an existing one (for example, the one made with File > Create Project). Projects opened before show up under Recent projects.
- In the engine, open your
.rangeand save the protected copy with File > Save .Range Protected File inside the project’sdata/folder. It has the.rasecextension. - Back in the panel, on the Project tab:
| Field | What it does |
|---|---|
| Game Name | Game name. |
| Version | Game version. |
| Main File | The .rasec file from step 3. While it’s still the example file, export is blocked. |
| Data Source | Folder with the game files (usually data). |
| Compile Python scripts | Ships compiled scripts instead of the source code. |
-
On the Paths tab, check Engine executables (the runtime for each platform) and Python for authoring tools. If they’re empty, use Copy Available Range Engine Files on the Tasks tab, which copies the engine runtime into the project’s
engine/folder.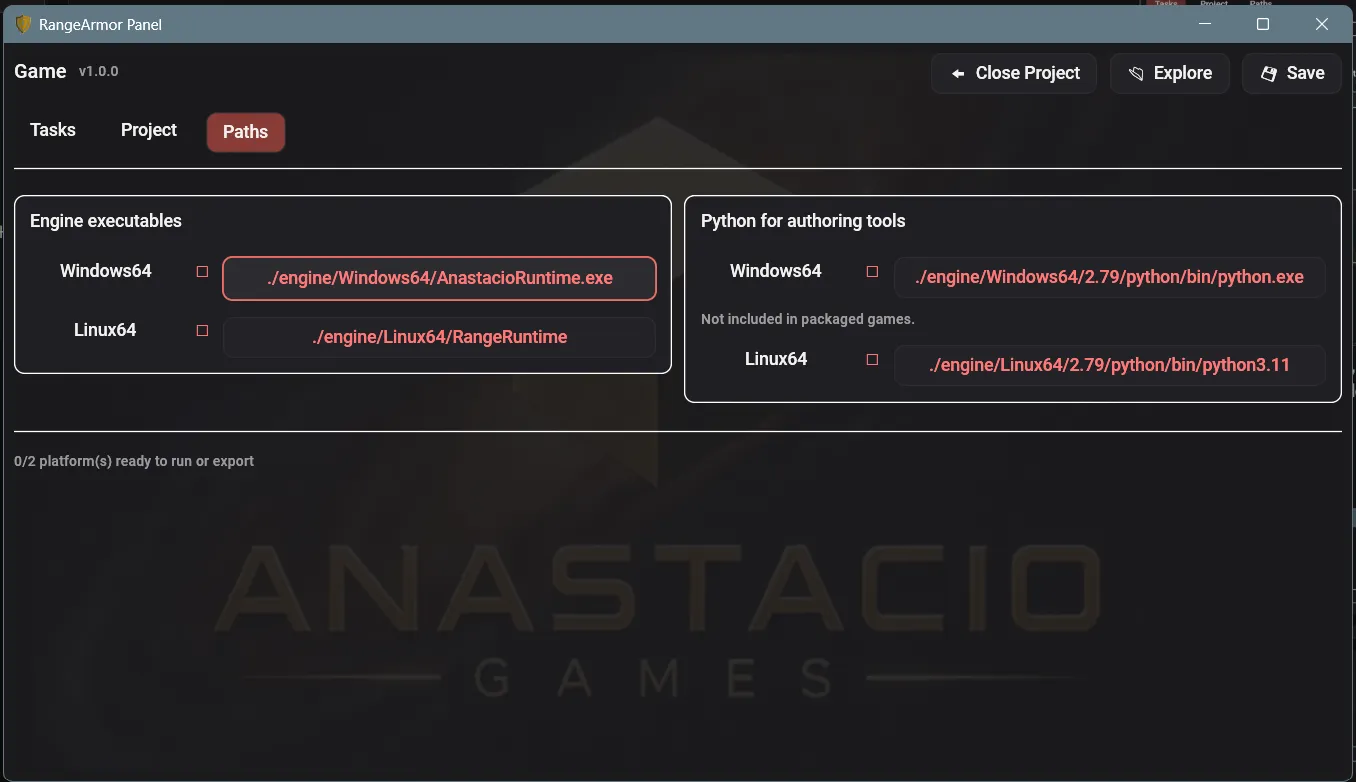
Paths in red with an empty box are files that don’t exist yet in the project’s
engine/folder. After Copy Available Range Engine Files, they get checked (✓) and the platform counts as ready at the bottom. -
Click Save to store the settings.
-
On the Tasks tab:
- Run game: runs the game the way the player will see it, to test first.
- Set Icons: picks the
.icoicons for the launcher and the executable. - Export to: exports one platform or All Platforms. Compress targets after export creates the zip.
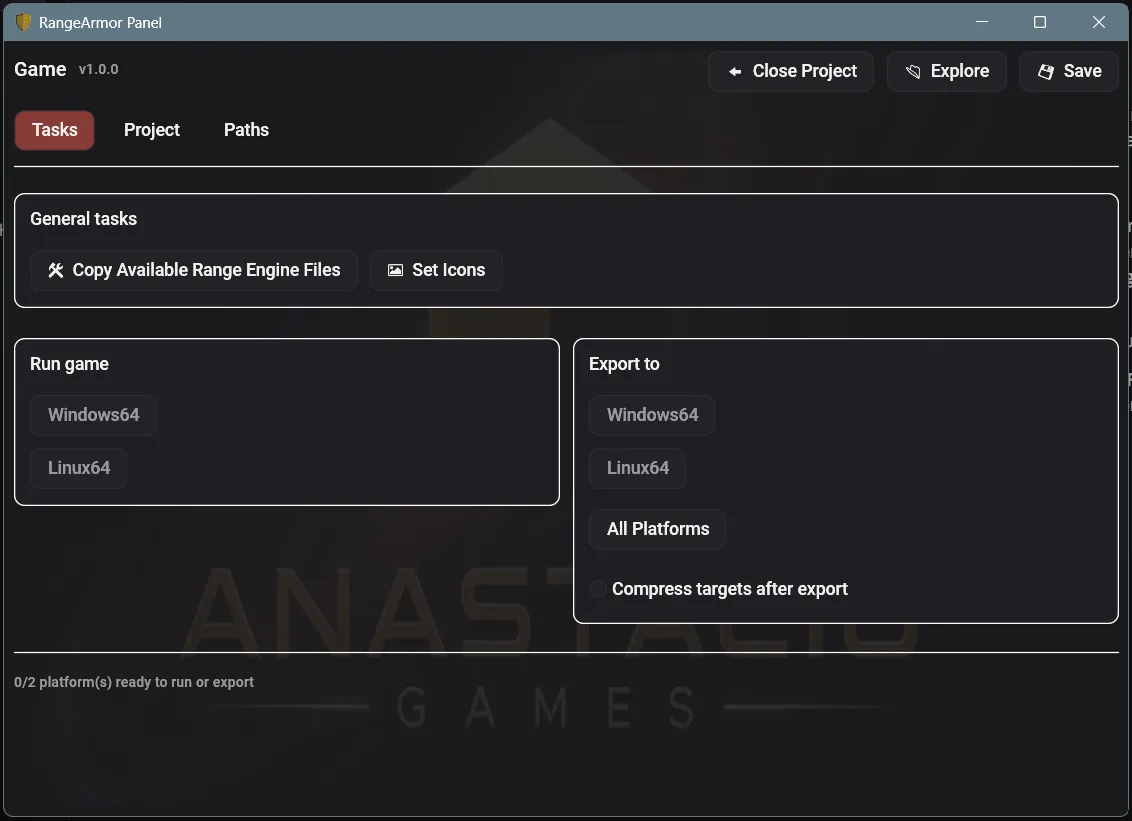
Gray platform buttons and the 0/2 platform(s) ready note at the bottom mean the runtime is missing. Click Copy Available Range Engine Files (step 5) and check Main File and Data Source; the buttons light up once the platform is ready.
-
The output goes to the project’s
release/folder. Explore opens the folder and Copy Log copies the log if something goes wrong.
5. Test and ship
Section titled “5. Test and ship”- Open
release/and extract the generated zip into any folder outside the project. - Run the game executable and play it from start to finish.
- If it works, that zip is what you send to players (itch.io, Steam, Google Drive…).
Testing outside the project matters: inside it, the game may find files that never made it into the package.
File protection
Section titled “File protection”The exported game uses a protected copy of the .range (.rasec extension), which doesn’t open in the editor. You can also create this copy manually with File > Save .Range Protected File. Always keep the original .range: it’s the only one you can edit.
Common problems
Section titled “Common problems”| Message | Fix |
|---|---|
| Save the .blend file inside the project’s data/ folder first | Save the file inside data/. |
| Current file is not inside a RangeArmor project | The .range is not in <project>/data/. Use File > Create Project. |
| build_release.py not found next to RangeArmor Panel | The rangearmor/ folder is missing or misnamed. See step 1. |
| Export finished with errors | Open the console (Window > Toggle System Console) to see the full error. |